In this blog I was show how I created my models needed for our game, it was a very long and boring process, but the end result is rewarding. Tim had found and and tort me how to create cardboard cutout models within Maya, the process is somewhat long, and can have many problems, but this is one of the only ways we could see in making models that we needed.
What I need to do before importing and working on the models
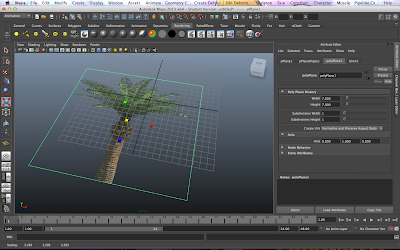
First things first, I needed a transparent image that I could work with, this involved editing images within Photoshop to achieve this task. Once the picture is transparent I could then import it into Maya. All I do next is make a flat plane, go into the Hypershade and apply the image to the flat plane. Then go into poly plane history and change it's width and height to 7, and then scale the flat plane up. Then rotate the flat plane 90 degrees.
(Example of image projected onto flat plane)
(Example of flat plane rotated 90 degrees)
Ensuring that I'm working in polygons within the work space, I can then go into the mesh toolbar and click create polygon tool. I then draw around the picture making a polygon outline of the image.
(Example of drawing around with the polygon tool)
Next we go back into Photoshop and expand the original canvas that my image was in to allow a cardboard texture to be applied.
(Example of tree and cardboard textures)
We then apply this new texture with the palm tree and cardboard to the newly made polygon which I just cut out. Once done I then go into the UV texture editor and fit the UV points around the texture image that I have applied to the model.
(Example of UV texture editor)
Once I'm happy with the way the palm tree has turn out on the polygon cutout, I can then move on to applying a back texture for the cardboard back of the model.
(Example of finish front and cardboard texture applied to the back)
(Example of planar mapping)
(Example of back support)
This process is then applied to all of my models, sometimes the process on the models would go fine without any problems, other would prove to be more difficult even though the process I conducted was the same, for example the Palm tree leaves had problems when trying to rap my UV points around the leaves, it would stretch or distort, this meant I would have to work even longer on the model to get it fixed.
The cactus model was very easy to do with is nice smooth edges, the texture file was done differently as this one was when I first started to make the models. I realised halfway through that I didn't need to make the cardboard cutout the same shape as the original image, as I could just simply make them big and open allowing easy UV texturing.
(Example of first cardboard cutouts that I did)
(Example of raping the UV points around the cactus image)
(Example of finished cactus cardboard cutout)
The cactus was a very easy model to make, and it came out fine. I'm pleased to see my cactus model completed. I thought this model might be a little hard because of it's roundness on certain edges, but I worked my way around it with no problems.
(Example of texture map)
(Example of UV wrapping)
(Example of back cardboard cutout)
(Example of little glitch)
The rock, you would think this would be the easiest, but it was actually pretty hard because of the amounts of little bumps and it's roundish shaped corners. It took a while to get this model complete, but there is however a little (Unnoticeable) glitch appearing on the texture, it looks slightly stretched and some of the cardboard has came through onto the rock image. I don't really know how it got there or how to fix it. When I try and fix it, I make it worse! But because the model is small and on the side of the track, it's very unnoticeable and not a big problem as I'm told by my team.
(Example of desert grass texture map)
(Large UV points)
(Finished grass cardboard cutout)
This is an example of UV texture mapping going weird when trying to make the desert grass line up, you can see the directions that I'm pulling in the UV mapping which are causing distortion within the image.
Finishing the cardboard cutouts, I could now move onto the checkpoint, start line, finish line, speaker, and banner.
I originally planned for my checkpoint to be textured in Zbrush but when I applied the made textures that Tim had created for it, it created a problem. I had no idea what was going on or how to fix it, so I exported my Zbrush model as an OBJ and opened it within Maya, there I could work on the model and apply the textures within Maya's UV texture editor.
(Example of error in Zbrush)
The first texture I worked on was the checkpoint. All I needed to do was make a box around the checkpoint font within the UV texture editor and it was done! A silver colour was added to the metal bars but to be honest it was already at a colour I was happy with, so it may not need any textures at all.
(Example of texture being applied to the models banner)
The same process was applied to all the rest of my UV textures. This process was made easier as I didn't even have to use the UV texture editor to crop around the image as the textures Tim had provided were all at the same size, meaning when I applied the new textures, they just fitted right into place, making life the little easier.
(Finish Line texture)
(Start line texture)
At some point Matt pointed out there was no need to make a start/finish line as the in game track was designed to be a circuit track, meaning when the players go around the track and come back to the beginning where they started, they'll see the words "start" again and again, and not the words finish. If we placed the words finish on the other side it would just confuse the players again when they see the words finish, every time they go around the track. To solve this problem we made a simple checkers texture, this is the start and finish line.
(Example of start/finish line)
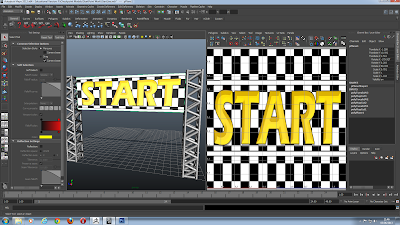
The banner was just the same plane as the checkpoint etc, just stretched out vertically. All I had to do was apply the texture Tim had made for the banner, however I did have to crop the UV points around the new bigger texture map in order to make it fit.
(Example of banner)
Now that all the checkpoints, start/finish lines and banners were completed, all that was left was the speaker model. This will be made within Maya as I knew a good way of easily cutting holes. First thing I did was import a polygon cube and size it up right so it looked like the correct portion for a speaker, then I created a polygon cylinder which I placed in the parts I wanted the holes to be. The cylinder would be used to cut the hole I needed to make in my polygon cube, so sizing the cylinder at the right size the hole needed to be was essential. By selecting the cylinder while holding shift and selecting the cube, I could then go into the mesh tool bar, and then booleans drop box to select differences, this would cut the hole in the cube that I needed allowing me to then import another cylinder which can go back into the hole that i've just cut so I have a face that I could use to texture the speakers on.
(Perfect hole cut outs for my speakers)
Texture files needed to be applied to the model once the holes were cut and cylinders faces were ready to be textured.
(Example of plastic texture for speaker)
(Example of Speaker Texture)
Applying these textures and using the UV texture editor to crop around what needed to be displayed, was very straight forward, I didn't have any problems with the texturing on this model.
(Example of UV texture mapping for speaker on the cylinders face that are sat in the made holes)
(Example of finished speaker model with plastic texture applied)


No comments:
Post a Comment