Sunday 26 May 2013

Seventh Week Of Final Major Project

20th May

Today Tim and me made a start on the track parts, at first we thought we were doing okay with the track parts, but after an hour or two we came into massive amount of problems. The idea was to make track parts within Maya and import them piece by piece and connect them all together in Unity 3D like a scalextric set. The track parts we had made, had size problems along side many other construction problems.

(Example of Straight made and texture by me)

I'd only manage to make a straight track part with many lumps and bumps to provide some terrain to the track, but as for any bends or corners we had major problems. We had no layout or track to follow, so we were making our track parts by eye, which caused the first part of the problems. We also ran into the track deforming itself when it came to bending the track parts, making the track fin and unsuitable.

(Example of attempt at making a bend with the level design to guide me, this failed)


This really worried us as we wanted to get the track parts textured and pieced together within Unity, but because of all the problems we had including delays because of other modules, we have greatly fallen behind.

*IMPORTANT UPDATE*

Discussion with Rob

After discussing our worries with Rob, our Final Major Project Idea has been redesigned, so we are no longer making an arcade game that players can sit down and play/drive. Our new idea that we are creating for our Final Major Project is to create a game trailer and showreel of our game, displaying all of our made assets, such as our designs, models, sound, music and gameplay.

This new idea means I do not have to code in unity for my music and sound effects, but my models and some of my music/sounds will still be used and displayed within the game trailer and showreel video.

23rd May

Recording for our theme tune of our game and voice overs.

Today I booked out the studio to record our theme tune, and voice overs needed for our game. Tim, Matt and me would be singing within our theme tune so this would be a great deal of fun.

I had already collected and edited an instrumental theme tune from Sega Rally Championships game, which I placed within Logic ready for everyone to sing to. We would be singing the same lyrics to the original singers from the Sega Rally Championship game but with a slight change, we would be singing Jäga Rally instead of Sega Rally.

This link is the original version that we are copying: http://www.youtube.com/watch?v=mywEY4ByuhA

(We are aware that the music used for our theme tune was not created by us and we do not own the rights to the music, we are not claiming the music as are own or selling it for commercial release, only for the use of our module)

Before I started recording our great singing voices, I needed to record and make the Jäga Rally title screen tune, this is very much like Sega titles screen tune used within their games, but with Jäga being pronounced not Sega.

Example of Sega's title tune
http://www.youtube.com/watch?v=AHPzki6e5S8 (This tune but with Jäga)

We did two takes of the title tune with all three of us singing down the AKG Microphone. The first take was a low Jäga call, the second was a high Jäga call. Mixing both of these recorded pieces together formed a satisfying tune. To make our Jäga title tune sound more representative of Sega's title tune, I added distortion by using guitar plugins within logic, this helped make our voices sound compressed just like the 16 bit Sega title tune. I also tried to copy the drum beat and synthesisers used in the Sega title tune so that are tune would be representative to Sega's

(Example of guitar plugin settings that provided the distortion I needed)


I then moved onto the Jäga Rally title screen commentary, this is just a voice over of someone saying the title of the game. Most arcade games have some form or another of getting their game name across, so that players can be alerted and informed of the title of the game. For this It was just Matt on his own, Matt would be the commentator of our game, so getting him to do a cheesy dark phrase of our title would be perfect. To make Matt's voice sound that little more cheesy and dramatic, I then added reverb to his voice to emphasize his speech.

To make the title/commentary of our game that slightly bit interesting I added in an apple loop sound effect of a car screeching past, this just helps represent that our game is vehicle based or that fast cars are involved.

After completing these tasks and getting them to a point that everyone was happy with, and a point where I was happy as well, I then moved onto the singing for our game. I first setup the gains on the mixing desk, making sure that our lovely voices wouldn't make the microphone peak. Once completing this task we all got into the sound booth and did one take of singing the Jäga rally theme tune. After checking to see if the recording piece we just did was okay, and that we were happy with it, I then cut and mixed our voices down.

This took a while to achieve as we sang slightly out of sink with the actual music, so a lot of editing and cutting needed to be done to make sure our voices matched up and were on the correct tempo within our song. Using EQ and Reverb on our voices, allowed me to improve the sound quality of our singing voices to the right level.

Our actual singing was awful but this is what we wanted. The singing part was completed, it was now time to simply mix the song down and get it all at the right level, ensuring that nothing peaked within the output. Once completed it was ready to go and to be used for our trailer/showreel.

(Example of the instrumental tracks and singing tracks)

Follow the link below to listen to the Jäga rally theme tune!
(https://soundcloud.com/patrickcollegework/jaga-theme-tune)

Music done and out of the way it was time to do the voice overs. We didn't have a script as such to follow, only something basic made on my Ipad which listed some of the corners and turns, but we already generally knew what phrases needed to be said and what corners and turns were used within the game. Collecting any extra voice over phrases is a bonus if anything changes within the game or game trailer, so we are at least covered within the sound/voice over department.

Recording Matt was a pretty fun task, I made Matt do voice overs for the menu screen, button selections, sponsors, and corners. I told Matt to say each line three times in three different ways, so that we could use the best sounding voice over. There were many mistakes here and there, but the overall task of capturing Matt's voice was pretty straight forward. The difficult task of this recording is choosing which voice over sound the best, and which ones are acceptable to use, this task is down to me to do.


 (Example of the collection of Matt's voice over and volume controls I had to add)

 (Link below is voice over collection)
https://soundcloud.com/patrickcollegework/collection-of-voice-over-new

From doing this today, I feel i've manage to achieve a great deal of audio work, the theme tune and voice overs are some of my final parts to my music work, and using the studio to perform my audio work gives me a much better understanding in the preparation needed to do a much better and faster performance in the studio. Being prepared is important, I admit I wasn't greatly prepared for today's work, but I feel the work I have done today was still good and at a level I'm pleased at despite not being totally prepared.

The past weeks have been a real struggle, I've been working very hard over the weeks to keep on top of my audio and model work so I'm on schedule, this may of effected the quality of my work. Finally seeing the last part of my audio completed this week did relieve me, but because the actual game it's self still hasn't even been started yet, I'm in a panic, but now changing our end project from an arcade game to a game trailer and showreel, really releases some of the stress i've been having lately.


Saturday 25 May 2013

Making the Music

How I made my music

Instead of using Logic to simulate that old school electronic sounding instrument and music style, used within the 90's and 80's, I decided to use my Yamaha DJX keyboard. This keyboard can perform loops and samples which can be used by me to create the music and style that we want for our game.

How to record

The Yamaha DJX MIDI input and output do not work on modern computers, it's to old, so in order for me to capture it's sound and tunes that I make within the keyboard, I need to record it's output from the headphone socket. To achieve this I used a double ended aux cable, one to the headphone socket and one to the mic input socket on my laptop. This method allowed me to record all the tunes into my laptop which I can then place within logic for more editing.

I've never used my Yamaha DJX keyboard before to do this, so everything I'm doing for the music of our game is somewhat new to me, this worries me and excites me at the same time. I'm worried a may not get the same music structure or tune that I could produce within logic using it's audio plugins but also excited by the results I might get from using this retro keyboard.

(Please note that the keyboard belongs to me, so I have the rights to use the loops and samples on the keyboard) 

Making the music

The first song I worked on was the main menu music. Thanks to the research I've done I have a very clear idea of how and what the menu music should feel and sound like, so finding and creating that same tune on my Yamaha shouldn't be to much of a problem. I wanted a relaxed but also funky tune that represented a 90's time period within the menu music. I have to make all the music loop properly, this means the songs can be replayed over and over without the listeners knowing that the song has restarted.

There were plenty of tunes as the Yamaha has a wide range of music genres to choose from. I could use one of the genres which sounded just right to me to create the menu music. I found and created the tunes I wanted and then recorded them into my laptop. I had to record sections of the samples and loops on the keyboard into logic, there I will have to piece the audio recordings together to make music.

(Track layout of Menu Music)

Making and arranging the music for the menu was very easy and straight forward. I made a good choice in starting off with the easy tunes, so I can get my head around the process in which is needed to be taken. I had to use some apple loops for the fills, the fills job is to demonstrate to the listeners that key changes are coming up within the song. Once I had got everything sounding the way I wanted, and looping well, I mixed and EQ the song and bounced it off, ready to go. I was pleased with the result I got from my menu music, it sounded just as I wanted it to. I showed my music to the team, and they loved it.

(Follow the link below to listen to the menu music)
https://soundcloud.com/patrickcollegework/menu-screen-music?in=patrickcollegework/sets/j-ga-rally-soundtrack

The next piece of music I worked on was the results music. This music is played when the player finishes all the laps in the race course, it will be played as the information of the players best time is displayed.

I wanted to create a piece of music that was very chilled, as I felt the player might want something a little low key after playing such a crazy rally game. So I spent some time working on my keyboard to create and find the tunes I needed. Once I found some tunes that could be blended together, I then recorded each part into logic. I want this song, to keep changing it's key/music style after 8 bars to keep the song interesting.

(Track layout of results music)

The music again still holds that very 80's and 90's music style feel, and is very cheesy, just the way we want it. I'm pleased with the outcome I got from this music, it's so cheesy it makes me cringe, but it's exactly what we were after. The music was shown to the team, they enjoyed it and agreed it should be used in the game for the results music. 

(Follow the link below to listen to the results music)
https://soundcloud.com/patrickcollegework/results-page?in=patrickcollegework/sets/j-ga-rally-soundtrack

It was time to move onto the in game music, I knew I wanted to make a crazy tune for our game, as well as one that was somewhat acceptable and reflected the games race track theme, but for now I would focus on the crazy tune. I explored the electronic/techno side of music genres to achieve this crazy style I had in my mind, so this involved exploring and playing around on my Yamaha till I got something I liked. 

I was looking for electronic sounds and tunes that were cheesy but yet catchy, and I think I found them when exploring my Yamaha. I record what I liked into logic, which I then pieced together to make my in game music. 

 (Example of track layout for Funky Jäga)

A lot of apple loops again needed to assist me in the fills that helped tell the listeners of key changes, I often found so far from making the music for our game that I have to use apple loops a lot to help me in that area, one of the many problems of making music through my Yamaha keyboard. Once the song had been structured, mixed down and ready to be bounced, I played it to my team, who enjoyed the funky and crazy tune. 

(Follow the link below to listen to Funky Jäga)
https://soundcloud.com/patrickcollegework/funky-j-ga?in=patrickcollegework/sets/j-ga-rally-soundtrack

The next song was the song which reflected more of the theme of the race track, but at the same time cheesy and somewhat unrelated to rally, as my music research shows the music used by Sega rally really do not sum up and reflect rally driving in anyway. This song took me a very long time to make, I needed to find the right tunes and key changes that blended together. After spending some time on this I finally found the tunes I wanted on my Yamaha and recorded them into logic. 

(Example of track layout for Shake the Jäga)

Making this song was very difficult. I ran into a lot of problems with key changes and appeal within the song. I added in apple loops tambourines and recorded MIDI hand claps played by me, to help bring out the tune within the song, as well to make it interesting and fun to listen to. The end result was okay by my standards, I didn't have a lot of time to keep working on the song, so I can't be to picky about it. The team again loved the song, which made me happy as I felt I didn't do a very good job in someways because of the time I had.

(Follow the link below to listen to Shake the Jäga)
https://soundcloud.com/patrickcollegework/shake-that-j-ga?in=patrickcollegework/sets/j-ga-rally-soundtrack


Outcome: I was somewhat pleased with the music I've made, I really wanted to make more than four songs, but because of the time it takes to make the music I couldn't keep working on it. I would of liked to of made longer in game music, something that was 4 minutes long, instead of the ones I've made which are 1 minute long. I would of loved to be able to display different structures of music within the songs as well, just like Sega Rally does, but time is not on my side and I really couldn't play or experiment with these ideas. I have to keep things short, It takes me a long time to find the right tunes and to edit them all together. However despite some disappointment, I feel I did achieve in my goal in making cheesy, and wacky sounding 90's and 80's style music for our game.


Thursday 23 May 2013

Making The Sound Effects

Within this blog post I will explain the process and thoughts I have undertaken when making the sound effects for our game.

From the research done, I know the sound effects from Sega Rally are pretty bad, understandably we want to create a somewhat parody of Sega Rally but I felt the sound effects can still be good instead of the low quality sound effects used by Sega Rally.

(Please note the following links provided will take you to soundcloud. The sound effects should play automatically, but sometimes it doesn't, just click the orange play button to play the sound effect. Also there appears to be a weird bug on soundcloud where it turns the volume off on the page. In the top right is an icon of a speaker, be sure that it is turned on. Thank you) 

Knowing which sounds I needed to make, thanks to my research, I started my sound effects with the easy ones. The first sound effect is the crowd cheering. To achieve the sound effect I wanted, I just used two apple loop sound effects (Please note that apple loops are royalty free). These two sound effects both provide when layered over each other, the correct sound effect that I needed. The overall sound these two sound effects created was perfect.

 (Example of crowd cheering tracks)

(Follow the link below to listen to crowd cheering) 
https://soundcloud.com/patrickcollegework/crowds-cheering?in=patrickcollegework/sets/sound-effects-for-j-ga-rally

Moving on I moved onto the booing, this wasn't as straight forward as the crowd cheering, for starters the only sound effects I could get of people reacting badly, was people booing. However I could use the booing sound effect together, mixed with three gasping sound effects. These gasping sound effects help provide that shock factor to the sound effect. Once I had controlled each tracks volume level, it was ready to go. I was surprised by the result I got which made me happy, and the team was to.
(Example of Crowd booing tracks)

(Follow the link below to listen to crowd booing)
https://soundcloud.com/patrickcollegework/crowd-boo-reaction?in=patrickcollegework/sets/sound-effects-for-j-ga-rally

Completing both crowd sound effects, I then moved onto the car bump. I wanted this sound to be light, not heavy, but when it came to experimenting with light bump sounds, they really sounded bad, just like the Sega Rally car bump sound effect. Knowing this, I mixed a range sound effects together to provide a level of texture within the sound effect. This range of texture helped to make the sound effect come across richer with detail, helping to express damage being taken. I used three metal impact sounds, this helps to show impact with the metal of the car, this along side with a glass breaking sound effect and metal crash sound effect, all helped to bring out the overall intended sound effect of a car taking damage.

(Example of Car bump tracks)

(Follow the link below to listen to car bump)
https://soundcloud.com/patrickcollegework/car-bump?in=patrickcollegework/sets/sound-effects-for-j-ga-rally

The skid would prove to be a bit of a challenge. Representing a sound effect which shows the wheels of a car, breaking against sand is a pretty tricky business, so a range of sound effects mixed together will be used to help bring out that sound effect that I need.
Six sound effects of debris from almost all terrains were used, such as earth debris, dirt debris and rock debris. These sounds effects were all controlled by volume to provide the correct level of detail within the sound effect. An extra sound effect from freesound.com 33416__acclivity__bicylestopping (Royalty free sound effects) of a bike breaking on sand was used to provide extra texture and representation of wheels skidding on sand. Because it's a rally car, and not a bike skidding, I added in an actual sound effect of wheels skidding against concrete. I used two different sound effects of wheels skidding and bounced them off as two separate audio files, one is a short skid the other is a long skid.

I can't honestly say how this sound effect will work within the game until I see and hear it work within the engine. From seeing it in the engine I will be able to determine if it needs further editing to make the skid sound effect better.

(Example of both skid tracks)


(Follow the link below to listen to shot skid)
https://soundcloud.com/patrickcollegework/skid-1?in=patrickcollegework/sets/sound-effects-for-j-ga-rally

(Follow the link below to listen to long skid)
https://soundcloud.com/patrickcollegework/skid-2?in=patrickcollegework/sets/sound-effects-for-j-ga-rally

The selection sound effect was created and designed around the same sound effects that Sega would design, so taking this into consideration I found some sound effects which can help represent that same sound. Collecting digital and computer sound effects can all help to show a sound effect that is computer generated. The three digital sound effects provide data like processing sounds that can help represent to the listener that a computer is processing information. The last sound, a computer data sound effect, brings that bleep and game like selection sound that was needed. I added an echo effect on the computer data sound effect to change it's form, as the original sound was to short and didn't sound very Sega, but by adding echo to it, it helped to bring that cheesy selection sound effect I wanted from it.
(Example Selection sound tracks)


(Follow the link below to listen to selection sound)
https://soundcloud.com/patrickcollegework/select?in=patrickcollegework/sets/sound-effects-for-j-ga-rally

Next was a the Selection highlight sound effect (Sound of a moving highlighter in game). This took the same thought process as the selection sound effect I did earlier, but for this highlight sound effect I will follow the same structure and sound as Outrun does within their game. The first Selection highlight I created had three whoosh sound effects overlapping each other, allowing the sound effects to work together to create a unique sound. However the first selection highlight was to intense, after displaying the sound to my team, so I turned it down by muting the middle track (as seen in image below). Whoosh 03 was a very intense audio file, so muting that sound allowed me to create a second sound effect which everyone was happy with.

 (Example of Selection highlights tracks)

(Follow the link below to listen to Selection highlight, the unused version)
https://soundcloud.com/patrickcollegework/selection-move-highlight?in=patrickcollegework/sets/sound-effects-for-j-ga-rally

(Follow the link below to listen to the new selection highlight)
https://soundcloud.com/patrickcollegework/selection-move-highlight-type?in=patrickcollegework/sets/sound-effects-for-j-ga-rally

A gear changing sound effects in modern games are designed to sound like the same gear changing sound effects heard in action movies, so taken that into consideration, I wanted to design my gear changing sound effect to have that same sound and feeling to it. Gear changes often have a piston hiss sound effect, with a clunk sound to represent the gears changing and taking effect within the car, so I found on freesound.org two sound effects which can help bring that texture and sound I need, 116598__mrmccormack__mrm-elantragearshfit and 119741__jesabat__steam-hiss. These two files of a gear stick changing in a car, to a steam hiss sound, can work together to bring out the sound effect I need. I added an extra sound to bring more texture to the sound effect by using another hiss sound, this sound was from apple loops, it is a sound effect of a spray can. Mixing all the sounds together and controlling their volume levels, allowed me to create a pretty cool gear changing sound effect, that everyone in the team really liked.

(Example of gear change tracks)

(Follow the link below to listen to gear change)
https://soundcloud.com/patrickcollegework/gear-change?in=patrickcollegework/sets/sound-effects-for-j-ga-rally

Having done most of the sound effects now. I need to now work on the sound effects for the car. Because of the tutorial Matt is using in unity to help make our game, already has a good sound effect of a car engine in loop and with a very decent range of pitch shifting engine sounds to represent levels of the cars gears, we all agreed because of the lack of time we have on this project, that we would use the tutorials car engine sound effects. However the car tutorial does not have a neutral car engine sound effect, so I tasked myself to quickly make one suitable to be used within our game.

I went onto freesound.org to get a sound effect of a cars engine in neutral. 106487__klankontwerp__4banger-engine-outside-2, this sound effect was great for what we wanted, but it still wasn't perfect, as the sound effect needed to be able to loop. It took me a long time to find the correct areas within the sound effect which could sync up when the sound replays, it's important to get the sound just right so the listeners are not aware of the audio repeating it's self. I did this by using the looping grid within logic (Green bar above the blue track in image below). I lined it up and moved it here and there till I found that sweet spot. Once I found it, I bounced the sound effect off. I checked it over with my team who also checked to insure it looped well, once checked they were all pretty impressed and pleased with the result.

(Example of neutral gear track)


(Follow the link below to listen to neutral gear)
https://soundcloud.com/patrickcollegework/engine-neutral-loop?in=patrickcollegework/sets/sound-effects-for-j-ga-rally

Summary:
From creating all of these sound effects for our game, I feel a great sense of achievement from creating them. I now have to wait to see how my sound effects play within the game engine, as we are not ready just yet for the sound effects. I feel bad for not making the sound effects for the car engines gears, but because of time, and the fact it's a tricky task to do, meant that I couldn't really create the sound effects, which is a great shame as I have never created a range of engine sound effects before. Overall the team all approved of the sound effects created, and I can feel complete, knowing that I have performed my role within the team to get these sound effects done.

Saturday 18 May 2013

Making The Models

16th May and 17th May

In this blog I was show how I created my models needed for our game, it was a very long and boring process, but the end result is rewarding. Tim had found and and tort me how to create cardboard cutout models within Maya, the process is somewhat long, and can have many problems, but this is one of the only ways we could see in making models that we needed.

What I need to do before importing and working on the models 

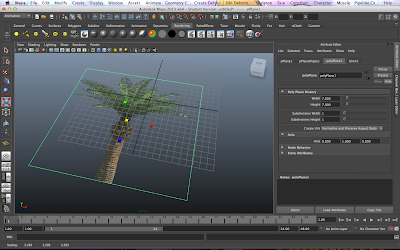
First things first, I needed a transparent image that I could work with, this involved editing images within Photoshop to achieve this task. Once the picture is transparent I could then import it into Maya. All I do next is make a flat plane, go into the Hypershade and apply the image to the flat plane. Then go into poly plane history and change it's width and height to 7, and then scale the flat plane up. Then rotate the flat plane 90 degrees.

 (Example of image projected onto flat plane)

 (Example of flat plane rotated 90 degrees)

Ensuring that I'm working in polygons within the work space, I can then go into the mesh toolbar and click create polygon tool. I then draw around the picture making a polygon outline of the image. 

(Example of drawing around with the polygon tool)

Next we go back into Photoshop and expand the original canvas that my image was in to allow a cardboard texture to be applied.

 (Example of tree and cardboard textures)

We then apply this new texture with the palm tree and cardboard to the newly made polygon which I just cut out. Once done I then go into the UV texture editor and fit the UV points around the texture image that I have applied to the model.

(Example of UV texture editor) 

Once I'm happy with the way the palm tree has turn out on the polygon cutout, I can then  move on to applying a back texture for the cardboard back of the model. 


(Example of finish front and cardboard texture applied to the back)

To do this I need to select the face of the back of my model and then click planar mapping, this creates another UV map in which I can just scale on the cardboard texture, projecting it's texture to the back of my model.
(Example of planar mapping) 

Finally the last part is to create the fold out support that keeps the cardboard cutout standing upright. this is just simply done by using the create polygon tool, and drawing it onto the model.

(Example of back support)

This process is then applied to all of my models, sometimes the process on the models would go fine without any problems, other would prove to be more difficult even though the process I conducted was the same, for example the Palm tree leaves had problems when trying to rap my UV points around the leaves, it would stretch or distort, this meant I would have to work even longer on the model to get it fixed.

The cactus model was very easy to do with is nice smooth edges, the texture file was done differently as this one was when I first started to make the models. I realised halfway through that I didn't need to make the cardboard cutout the same shape as the original image, as I could just simply make them big and open allowing easy UV texturing.
(Example of first cardboard cutouts that I did)

(Example of raping the UV points around the cactus image)
(Example of finished cactus cardboard cutout)

The cactus was a very easy model to make, and it came out fine. I'm pleased to see my cactus model completed. I thought this model might be a little hard because of it's roundness on certain edges, but I worked my way around it with no problems.

(Example of texture map)

(Example of UV wrapping)

 (Example of back cardboard cutout)

(Example of little glitch)

The rock, you would think this would be the easiest, but it was actually pretty hard because of the amounts of little bumps and it's roundish shaped corners. It took a while to get this model complete, but there is however a little (Unnoticeable) glitch appearing on the texture, it looks slightly stretched and some of the cardboard has came through onto the rock image. I don't really know how it got there or how to fix it. When I try and fix it, I make it worse! But because the model is small and on the side of the track, it's very unnoticeable and not a big problem as I'm told by my team. 

(Example of desert grass texture map)

(Large UV points)

 
 (Finished grass cardboard cutout)

The desert grass with out a doubt caused the most problems and headaches. It had a number of problems when applying the UV points around the texture map. It would stretch and deform when moving the UV points into the correct positions to project the grass texture. Because all of these models are meant to look like cardboard cutouts, they were originally designed to be bad in some ways and obvious that they are cardboard cutouts. After explaining my problem to Tim and Matt, they both agreed that having the desert grass printed on a cardboard would be funny and acceptable to what we wanted.

This is an example of UV texture mapping going weird when trying to make the desert grass line up, you can see the directions that I'm pulling in the UV mapping which are causing distortion within the image.

Having never done anything like this before, I've feel as if I have learned a great deal from creating these models and the process taken to make them. I've never really been totally confident in UV mapping within Maya before until creating these models. I feel from making these silly cardboard cutouts that have learned and improved my modeling skills with Maya.

Finishing the cardboard cutouts, I could now move onto the checkpoint, start line, finish line, speaker, and banner.

I originally planned for my checkpoint to be textured in Zbrush but when I applied the made textures that Tim had created for it, it created a problem. I had no idea what was going on or how to fix it, so I exported my Zbrush model as an OBJ and opened it within Maya, there I could work on the model and apply the textures within Maya's UV texture editor.

 (Example of error in Zbrush)

The first texture I worked on was the checkpoint. All I needed to do was make a box around the checkpoint font within the UV texture editor and it was done! A silver colour was added to the metal bars but to be honest it was already at a colour I was happy with, so it may not need any textures at all.
(Example of texture being applied to the models banner) 

The same process was applied to all the rest of my UV textures. This process was made easier as I didn't even have to use the UV texture editor to crop around the image as the textures Tim had provided were all at the same size, meaning when I applied the new textures, they just fitted right into place, making life the little easier.

(Finish Line texture)

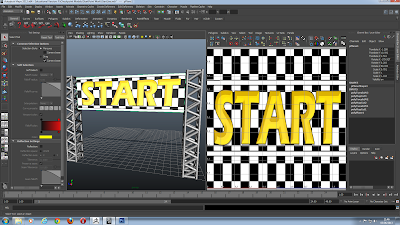
(Start line texture)

At some point Matt pointed out there was no need to make a start/finish line as the in game track was designed to be a circuit track, meaning when the players go around the track and come back to the beginning where they started, they'll see the words "start" again and again, and not the words finish. If we placed the words finish on the other side it would just confuse the players again when they see the words finish, every time they go around the track. To solve this problem we made a simple checkers texture, this is the start and finish line. 

 
(Example of start/finish line) 

The banner was just the same plane as the checkpoint etc, just stretched out vertically. All I had to do was apply the texture Tim had made for the banner, however I did have to crop the UV points around the new bigger texture map in order to make it fit.

(Example of banner)

Now that all the checkpoints, start/finish lines and banners were completed, all that was left was the speaker model. This will be made within Maya as I knew a good way of easily cutting holes. First thing I did was import a polygon cube and size it up right so it looked like the correct portion for a speaker, then I created a polygon cylinder which I placed in the parts I wanted the holes to be. The cylinder would be used to cut the hole I needed to make in my polygon cube, so sizing the cylinder at the right size the hole needed to be was essential. By selecting the cylinder while holding shift and selecting the cube, I could then go into the mesh tool bar, and then booleans drop box to select differences, this would cut the hole in the cube that I needed allowing me to then import another cylinder which can go back into the hole that i've just cut so I have a face that I could use to texture the speakers on.

(Perfect hole cut outs for my speakers) 

Texture files needed to be applied to the model once the holes were cut and cylinders faces were ready to be textured. 

(Example of plastic texture for speaker)


(Example of Speaker Texture) 

Applying these textures and using the UV texture editor to crop around what needed to be displayed, was very straight forward, I didn't have any problems with the texturing on this model.

(Example of UV texture mapping for speaker on the cylinders face that are sat in the made holes)

(Example of finished speaker model with plastic texture applied)

I look forward to seeing how my models will look within Unity. I hope they import alright and don't have any problems, as I didn't really enjoy the modeling process, this being because I'm not a confident modeler, but I put myself out there to do it so I could improve my modeling skills and prove to myself that I could do it and I feel I have achieve this. This process allows me to move on within our project so we can keep on track and on schedule. 

Friday 17 May 2013

Sixth Week Of Final Major Project

13th May 
Due to deadlines from other courses (Context in studies) this has delayed use on our work today on working on the track parts and model creation, however Tim and me did get round to working out which models we'd be working on and planning out how we were going about to achieve the task at hand, having never really made models from images before, it could prove to be a difficult task.

The track tiles will be made together, me and Tim, so we can help each other out if needs to be. Again the track parts much like the models Tim and me are set to make, we've never really done before so it may be a difficult task with lots of problems and errors if things don't go to plan.

The Models I'll be working on is:
- Speaker
- Billboards
- Start/Finish/Checkpoint Line
- Tyre wall
- Plant Life (2D Cutouts)
  • Trees
  • Cacti
  • Derset Grass
  • Rocks 
Tim's Model List:

2D Cardboard Cutout of crowd model
  • Graeme (Female Version)
  • Marz
  • Rob
  • Matt
  • James
  • Patrick
  • Steve (Female Version)
  • Tim (Female Version)
The 2D models will be made from images, they will then be turned into cardboard like cutouts, these are the things me and Tim need to consider when making the models and work out having never made any models like this before. 

15th May

The Deadline for context in studies was today which meant everyone was trying to sort out they're work. Admittedly because of the deadline today we didn't get much in the way of work for our Final Major Project done today.

From this week me and Tim have set ourselves the task in making the track parts and models for next week. We're aware that we have falling behind in our work, which is really worrying but we're going to try our best to work hard and catch up so we're on time and keeping to schedule. We didn't take into account that other modules might cause us to fall behind within our final major project. 

Thursday 9 May 2013

Fifth Week Of Final Major Project

8th May

Today I started working on the 3D Model of the checkpoint, which can also be used as the start line and finished line. Although our model assets list hasn't been created yet, as this has been prolonged to next week, me and Tim both agreed that I would be making the checkpoint, so I made a start on this.

 (Example of my made bar)

I started working on the metal bar just like I designed in the concept art, the metal bar took me along time to make within Zbrush. I tried to keep it low poly so I never once divided the models parts to increase the quality of the poly for better graphics and image, as we want our models to look blurry and low, just like Sega Rally's game graphics.

(Example of my cloned bar)

Once I done the metal bar I merged all the bars together to make one whole metal bar. I then just simply copied and pasted my metal bar to make two metal bars, insuring they were lined up properly for the plane that I need to insert later. I have now almost completed my start, finish, and checkpoint.

All I did next was to add a flat plane in-between the two metal bars to finish my checkpoint, start, and finish line.
The flat plane can also be stretched out vertical to make a nicely sized banner, this allows me to hit two birds with one stone, so this can also be used as a banner.

(Example of my finish checkpoint and banner)

All I need to do now is texture my model, I will ask Tim to provide me with a Start, Finish, and Checkpoint textures for my model, and if possible a banner advertisement as this can now be used as the banner for our game.

Today's work on my model really helped me get into and feel apart of our module, seeing the first parts of our game coming alive makes me feel very optimistic about our game. I hope to do more models soon, the sooner the better. Having a complete list ready and made next week will allow me to finally see what models I will be making, including track parts.